2026-02-12
How to Create Subtitles from Audio A Practical Guide
The best way to create subtitles from audio is to use a good AI-powered transcription service. These tools can automatically convert your spoken words into a time-coded text file, giving you a remarkably accurate first draft in just a few minutes. From there, you can clean it up, make edits, and export it as an SRT or VTT file that works on virtually any platform.
It's a far cry from the old days of typing everything out by hand.
Why Turning Audio into Subtitles Is a Must-Do
Let's be clear: subtitles aren't just an afterthought anymore. They're a core part of any smart content strategy. When you convert the audio from your videos or podcasts into text, you're not just adding words to a screen; you're unlocking real, tangible benefits that help you grow your audience and keep them engaged.
This simple idea—turning sound into text—has a ripple effect, touching everything from basic accessibility and search engine optimization (SEO) to your ability to reach viewers around the world.
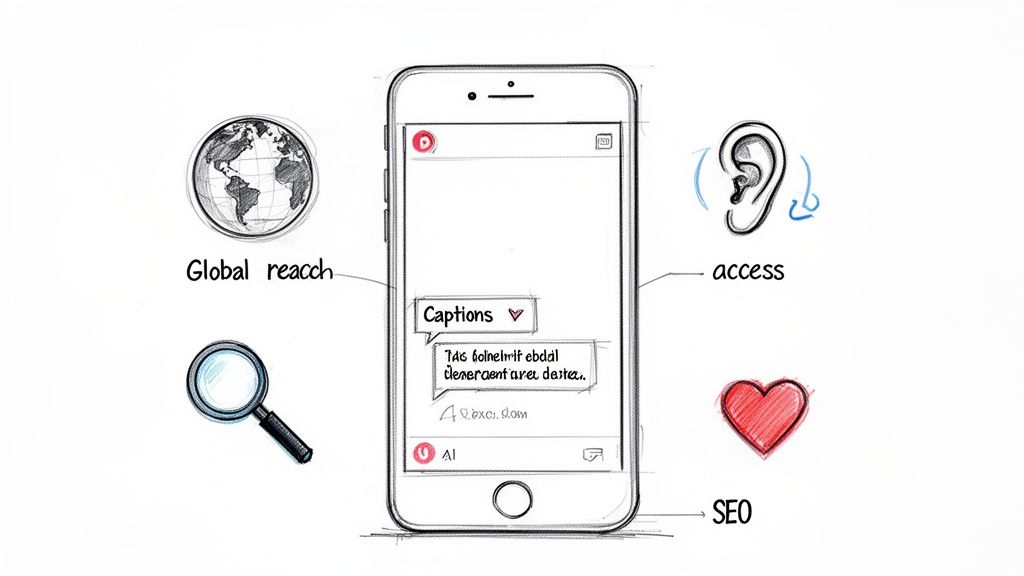
Broaden Your Content's Reach
At its heart, adding subtitles is about inclusivity. You're immediately making your content accessible to viewers who are deaf or hard of hearing, which is reason enough to do it. But the benefits don't stop there.
Think about how people actually consume content today. A huge number of videos on social media are watched with the sound off. If you don't have subtitles, your message is completely lost.
Here’s what you gain:
- Make Your Content Accessible: You instantly open your work to a much larger audience, including people with hearing impairments.
- Boost Engagement: You can finally capture the attention of people scrolling on public transit, in quiet offices, or late at night. This directly leads to longer watch times.
- Improve Comprehension: Subtitles help everyone, even native speakers, better understand complex topics, technical jargon, or just fast-talking presenters.
The Shift to AI-Powered Subtitling
The demand for tools that create subtitles from audio has exploded. The AI transcription market is already valued at $4.5 billion and is on track to hit a massive $19.2 billion by 2034. That's a 15.6% compound annual growth rate, which tells you everything you need to know about where the industry is heading.
This isn't just a trend; it's a fundamental shift. Moving from manual transcription to AI-powered services can cut your costs by up to 80% and slash turnaround times from days to mere minutes. Suddenly, creating high-quality subtitles is something any creator can do at scale. You can find more data on automated transcription trends from our friends at Sonix.ai.
When you turn your audio into text, you're also handing search engines like Google a complete transcript of your content. This means your video or podcast can start showing up in search results for the actual words spoken in it, driving organic traffic long after you hit publish.
Choosing Your Subtitle Format SRT vs VTT
When you're ready to export your subtitles, you'll usually have to choose between two main file formats: SRT and VTT. They look similar, but have some key differences. SRT is the classic, no-frills format that works everywhere, while VTT is a more modern standard that allows for styling and more advanced features.
Here's a quick breakdown to help you decide.
| Feature | SRT (.srt) | VTT (.vtt) |
|---|---|---|
| Compatibility | Universal. Supported by nearly all platforms. | Widespread. Supported by most modern platforms and HTML5 video players. |
| Basic Formatting | Supports basic bold, italic, and underline. | Supports the same basic formatting as SRT. |
| Advanced Styling | No. Does not support color, font, or positioning. | Yes. Allows for advanced styling with CSS for text color, position, etc. |
| Metadata | No. Just the subtitles and timestamps. | Yes. Can include comments and metadata within the file. |
| Best For | Maximum compatibility, especially on older platforms. | Web video (YouTube, Vimeo) and when you need custom styling. |
For most people, SRT is the safest bet due to its universal compatibility. But if you're embedding videos on your own website and want to control the look of your captions, VTT gives you that extra power.
Getting Your Audio Ready for Transcription
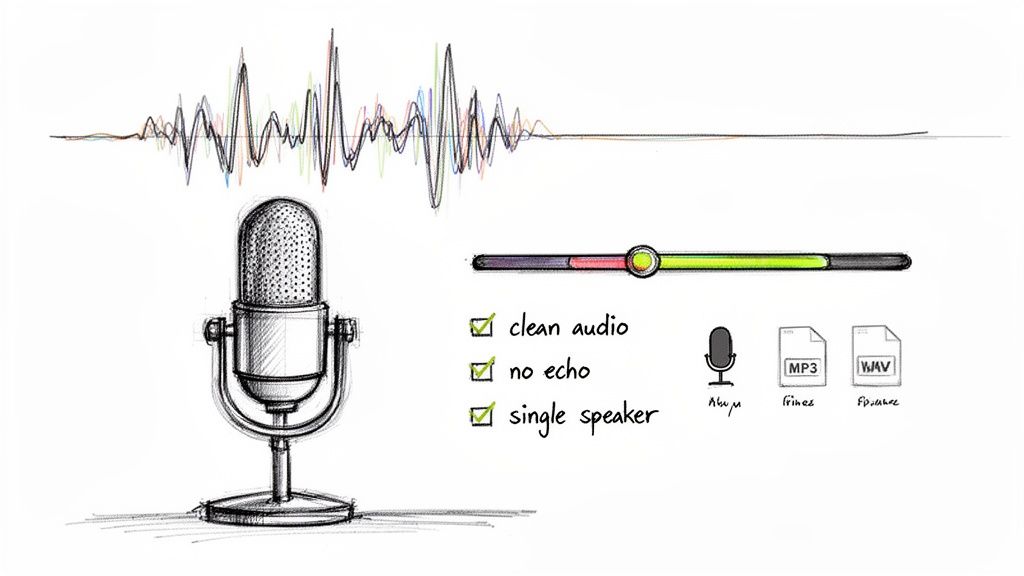
I can't stress this enough: the secret to getting subtitles that are 99% accurate right out of the gate has nothing to do with the AI tool you use. It all comes down to the quality of your audio file. It’s the classic "garbage in, garbage out" scenario. The cleaner your audio, the less time you’ll spend fixing mistakes later.
Before you even think about uploading your file, give it a quick listen. That faint air conditioner hum, the distant traffic noise, or two people talking over each other? Those are the exact things that trip up even the most sophisticated AI. A few minutes of prep work here will save you a ton of editing headaches down the line.
Your Audio Prep Checklist
Here are a few things I always do to make sure my audio is in the best possible shape. These are simple tricks, but they make a world of difference.
- Kill the Background Noise: You can use free software like to run a quick noise reduction filter. It's surprisingly effective at getting rid of consistent sounds like electronic hums or fan noise.
- One Speaker at a Time: If you're recording an interview or a conversation, do your best to avoid having people talk over one another. Clean, distinct speech is what the AI is listening for.
- Ditch the Echo: Recording in a room with carpets, curtains, or even a few pillows can absorb sound and cut down on reverb. An echo-filled recording is a nightmare for transcription software.
- A Good Mic Goes a Long Way: You don't need to break the bank, but an external microphone will almost always deliver clearer audio than the one built into your laptop or phone.
My golden rule is this: An AI can't transcribe what it can't hear. Giving it a clean audio file is your shortcut to a near-perfect transcript on the first try, slashing your manual correction time.
What's the Best File Format?
Finally, let's talk file formats. While most transcription tools are pretty flexible, your choice can impact the final quality. For the best results, you want to go with something that preserves as much detail as possible.
- WAV: This is the gold standard. It's an uncompressed format, meaning it keeps all the original audio data. If you have a WAV file, use it.
- MP3: This is the format most people are familiar with. It's compressed, which is fine, but make sure it has a high bitrate—at least 192 kbps—to ensure the voice quality isn't muddy.
Getting these basics right will set you up for success. For a more in-depth look, check out our guide on .
Getting Your First Draft with an AI Tool
Now for the fun part. With your audio file prepped and ready to go, you can hand it off to an AI tool to do the heavy lifting. This is where you really see the magic happen, turning what used to be hours of painstaking manual transcription into a job that’s done in minutes. Honestly, the speed is the biggest game-changer.
Using a platform like makes the process incredibly simple. Most modern tools have a clean, intuitive dashboard, so you don’t need to be a tech wizard to figure it out. You can just jump right in.
Here’s what a typical interface looks like—nice and clean, right?
The goal is to get you from upload to transcript as fast as possible, often with a simple drag-and-drop feature to kick things off.
From Upload to First Draft
Once your file is in the system, the AI takes over. The first thing you'll likely do is confirm the language spoken in the audio. This step is critical because it tells the AI which specific language model to use for the best results. These tools can handle dozens of languages and dialects, so they’re pretty versatile for just about any project.
From there, the system gets to work. While you’re watching the progress bar, the AI is doing some pretty complex stuff behind the scenes:
- It’s analyzing the audio waveform to separate voices from background noise.
- It’s converting every spoken word into text with impressive accuracy.
- It’s creating precise timestamps for each word or short phrase.
- It even tries to identify and label the different speakers in the conversation.
The whole process is built for speed. You can often see the text populating in real time, already synced up with your audio. If you want to get into the nitty-gritty of how it all works, our guide on the best is a great place to start.
The objective here isn't a flawless transcript right out of the gate. The aim is to get a high-quality draft that's about 95% accurate. This AI-generated file is your starting point, saving you a massive amount of upfront work.
I like to think of the AI as a very fast but slightly naive assistant. It does all the tedious, time-consuming work almost perfectly, leaving you to step in as the expert editor. Your job shifts from being a typist to being a proofreader, which is a much more efficient and, frankly, more enjoyable task.
Polishing Your AI-Generated Subtitles
The AI has given you a fantastic head start, often delivering a draft that’s around 95% accurate. But that last 5%? That’s where the human touch comes in. This is the part where you take a good transcript and turn it into polished, professional subtitles that feel seamless to your audience.
Most modern AI transcription tools, like , have a built-in synchronized editor, and this is where the magic happens. It’s not just a text box—it’s an interactive workspace where every single word is timestamped and linked to your audio or video. If you hear something that doesn't look right, just click the word in the transcript, and the media player will jump right to that spot. It makes finding and fixing errors incredibly fast.
Getting to this editing stage is a pretty straightforward process.
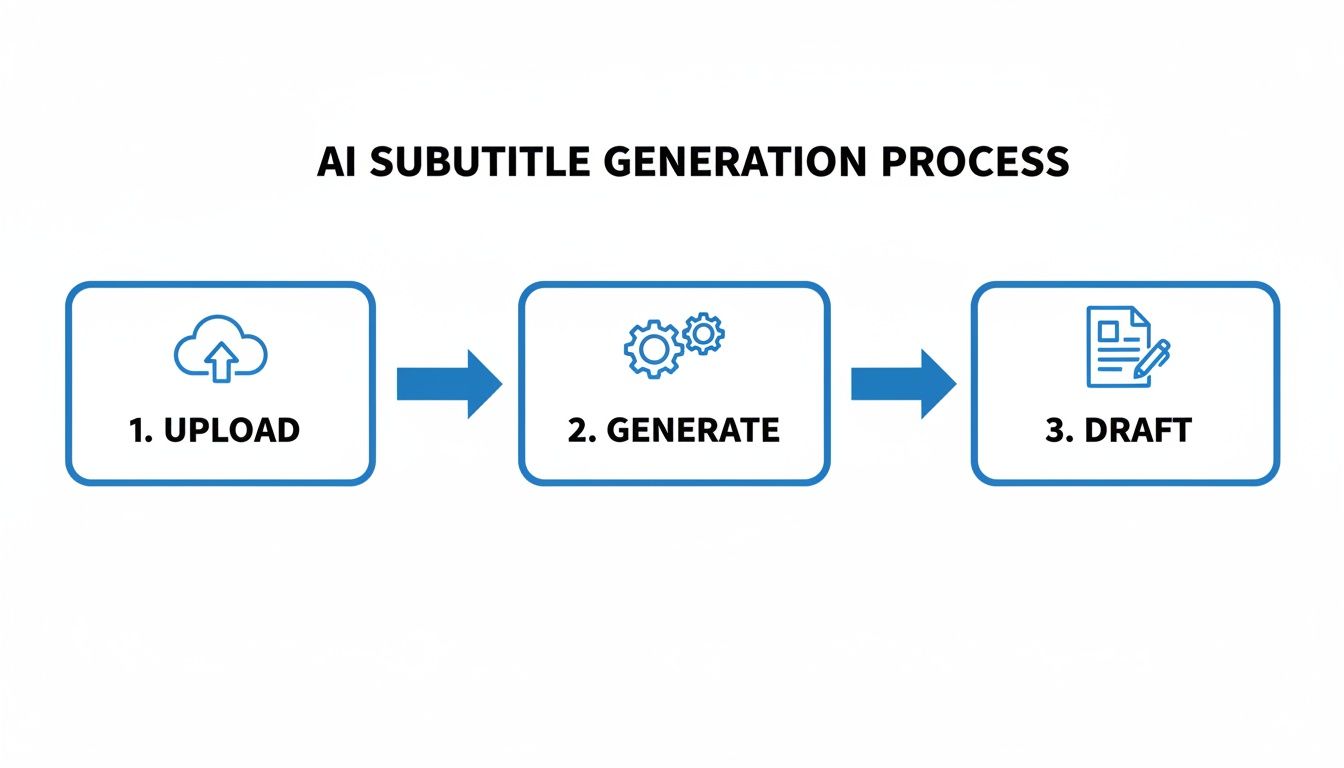
As you can see, you just upload your file, let the AI work its magic, and you're left with a solid first draft that’s ready for you to refine.
First Pass: Getting the Words Right
For your first round of edits, just press play and read along. Your main goal here is to catch any glaring errors the AI might have made.
Keep an eye out for these common slip-ups:
- Proper Nouns and Jargon: AI can get tripped up on unique names, specific company terms, or technical language. This is usually the first thing I check for.
- Homophones: Be on the lookout for words that sound alike but are spelled differently. Think "their" vs. "there," or "your" vs. "you're." These are easy for AI to mix up but just as easy for you to fix.
- Punctuation: The AI does a decent job here, but you'll want to tweak the punctuation to match the speaker's natural rhythm. A well-placed comma can reflect a pause, while a period can add finality.
This is also the best time to fix speaker labels. The AI will likely assign generic tags like "Speaker 1" or "Speaker 2." It only takes a minute to swap those out for the actual speakers' names, which makes the whole thing much clearer for your audience.
Remember, the point isn’t just to be technically correct. It’s to make the subtitles easy to read. They should flow so naturally that the viewer barely notices them.
Fine-Tuning the Subtitle Timeline
Once the text itself is perfect, it's time to focus on timing. This is what truly separates professional subtitles from amateur ones. How the text appears and disappears on screen has a huge impact on the viewing experience.
In the editor, you'll mainly be doing two things:
- Merging Short Subtitles: Sometimes, the AI will break up a natural sentence into tiny, choppy subtitle blocks. It’s much better for readability to merge these into a single, cohesive subtitle.
- Splitting Long Subtitles: On the other hand, you don’t want a massive wall of text appearing on screen all at once. If you see a long, complex sentence, it's best to split it into two or three smaller, more digestible chunks.
For instance, the AI might generate this:
(00:15) We need to talk.(00:16) About the new project.
That feels a bit disjointed, right? A quick merge makes it much smoother:
(00:15) We need to talk about the new project.
This kind of careful adjustment makes all the difference. When you take the time to create subtitles from audio this way, you're not just providing text—you're guiding your viewer's experience and making your content more accessible and professional.
Putting Your Final Subtitles to Work
You've done the hard work of transcribing and polishing your subtitles. Now it's time for the final, crucial step: exporting them and getting them in front of your audience.
How you deliver your captions really depends on where your content will live. You've got two main routes to choose from, and picking the right one makes all the difference for viewer experience.
Most AI transcription tools make this part easy. You'll typically find a simple export screen where you can grab your finished files in a couple of clicks.
The trick isn't just downloading the file; it's choosing the right format and delivery method for your specific platform.
Subtitle Files vs. Burned-in Captions
You can either keep the captions as a separate file that plays alongside your video, or you can permanently "burn" them into the video frames. Let’s look at when to use each.
The Best of Both Worlds: SRT and VTT Files
For most professional video platforms—think , , or even LinkedIn—your best bet is exporting a separate subtitle file. The two industry standards you'll see everywhere are:
- SRT (.srt): The classic, most widely supported format. It's a simple text file with dialogue and timestamps.
- VTT (.vtt): A more modern format that offers styling options like bolding and italics, making it great for web-based video players.
When you upload one of these files with your video, the platform displays them as closed captions (CC). This is a huge win for viewers because it gives them complete control. They can turn captions on or off, and sometimes even change the font size or language. It's the gold standard for accessibility and user choice.
Pro Tip: Using a separate caption file is also better for SEO. Search engines like Google can crawl the text in your SRT or VTT file, which helps them understand what your video is about and rank it for relevant keywords.
If you want to get into the nitty-gritty of uploading these files, we've got a detailed guide on .
When to Go Permanent: Burning Captions In
The other option is to permanently burn the subtitles into the video itself. This is what's known as open captions—they're always on, and the viewer can't turn them off.
So, why would you take away that control? Simple: social media.
On platforms like Instagram, TikTok, and Facebook, videos often autoplay with the sound off. In fact, a huge chunk of users never turn the sound on. If your message relies on audio, it’s completely lost. By burning in your captions, you guarantee your story gets told, silent or not.
A Quick Comparison
Here’s a simple breakdown to help you decide which path to take.
Choosing Your Subtitle Delivery Method
| Method | Best For | Pros | Cons |
|---|---|---|---|
| Separate File (.srt/.vtt) | YouTube, Vimeo, online courses, corporate websites | • Viewer can turn on/off • Accessible for all users • Better for SEO | • Relies on platform support • Viewer must enable them |
| Burned-in (Open Captions) | Instagram, TikTok, Facebook, social media ads | • Always visible, even on mute • Guarantees message is seen • No action required by viewer | • Viewer can't turn them off • Can't be crawled by SEO |
Ultimately, your choice should be driven by where your audience is and how they consume content.
Beyond a Single Language
Once your primary subtitles are perfect, don't stop there. Modern tools often let you translate your captions into dozens of languages with just one click. This is a game-changer for expanding your reach. You can instantly create subtitles from your audio that connect with people all over the world, making your content truly global.
Got Questions About Making Subtitles? We've Got Answers.
Even with the best tools at your disposal, you're bound to have questions when you start turning audio into subtitles. Getting straight answers can save you a ton of headaches and help you sidestep the usual mistakes. Here are some of the most common questions we get from creators just like you.
Think of this as your quick-reference guide. We'll cover everything from accuracy expectations to file types, giving you the practical insights you need to get the job done right.
How Accurate Is AI Transcription, Really?
This is the big one. Modern AI transcription tools can hit up to 99% accuracy, but that comes with a pretty big asterisk. That number assumes you're working with a crystal-clear audio file where speakers are easy to understand and there's no background noise.
In the real world, things get a bit messy. Accuracy can take a hit from:
- Heavy accents the AI hasn't been trained on.
- People talking over each other (the AI’s nightmare).
- Bad audio quality from a cheap mic or a noisy room.
That’s why you should always treat the AI transcript as a really, really good first draft. Plan on spending a few minutes in an editor to clean up any awkward phrasing, fix punctuation, or correct a misspelled name. That final human polish is what separates decent subtitles from professional ones.
What's the Difference Between Subtitles and Captions?
People mix these up all the time, but the distinction is actually pretty important, especially if you care about accessibility.
Subtitles are for viewers who can hear the audio but don't understand the language. Their main job is translation. Think of watching a foreign film—the text on screen is a subtitle.
Captions, however, are for viewers who can't hear the audio. They don't just include the dialogue; they also describe important sounds that add context. You'll see these written in brackets, like [music playing] or [door slams].
If you're aiming for true accessibility and want to comply with standards like the Americans with Disabilities Act (ADA), always go with captions. They ensure everyone gets the full experience, regardless of their hearing ability.
Can I Make Subtitles for Audio with Multiple Speakers?
Absolutely. This is where a good AI tool really shines. Advanced platforms are built to tell different voices apart. The AI will listen to your file and automatically assign labels like "Speaker 1," "Speaker 2," and so on.
This saves a massive amount of time. Once the AI has done the heavy lifting, you just need to pop into the editor and swap out those generic labels for the actual speakers' names. It's a crucial step for things like podcasts, interviews, or panel discussions where your audience needs to know who’s talking.
How Long Does It Actually Take to Create Subtitles?
This really depends on how you do it. The old-school, manual way is a grind. If you're transcribing and timing everything by hand, you can expect it to take 5 to 10 times the length of the audio file. That means a one-hour video could easily eat up an entire workday.
This is where AI changes everything.
Using an AI transcription service cuts that time down dramatically. An hour-long file can be transcribed in just a few minutes. After that, you'll probably spend another 15 to 30 minutes proofreading and making small tweaks. What used to take hours can now be done in the time it takes to drink a cup of coffee.
Ready to turn your audio into accurate, professional subtitles in minutes? With Kopia.ai, you can transcribe, edit, and export your content effortlessly. Our AI-powered platform gives you a 99% accurate starting point, a synchronized editor for easy polishing, and one-click translations to reach a global audience. .